Apex vs Flow
Apex :
Apex is a strongly typed, object-oriented programming language that allows developers to execute flow and transaction control statements on Salesforce servers in conjunction with calls to the API.
How does Salesforce Apex work?
Apex enables developers to access the Salesforce platform back-end database and client-server interfaces to create third-party SaaS applications. Apex includes an application programming interface (API) that Salesforce developers can use to access user data on the platform.
Difference Between Flow and Apex :
| Flow | Apex |
| Flows can be built by admins | Apex code is typically built by developers only |
| Flows are simpler and should be used before Apex code. | Apex code is considered a tool of last resort. If the logic is too complex, Apex code should be Used |
Invoking Apex with Flow in Salesforce:
- Create an Invocable Method.
- Create Invocable Variable.
- Add Logic to the code.
- Invoke Apex from Flow.
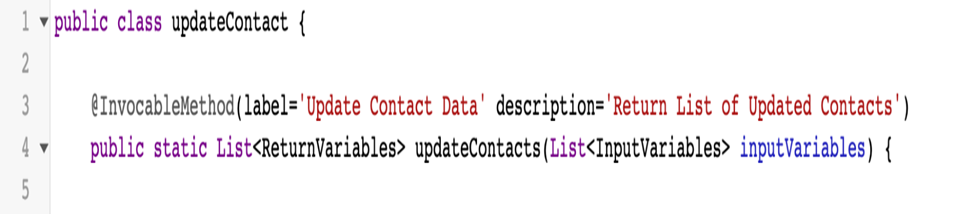
Create an Invocable Method:
- The invoked method is the method that is called by the Apex Action in the Flow.
- The @InvocableMethod annotation allows the Flow to call the method.
- Use the ‘label’ attribute to define the display name of the Apex Action.
- It can have only one parameter.
- You can have only one invocable method per class.
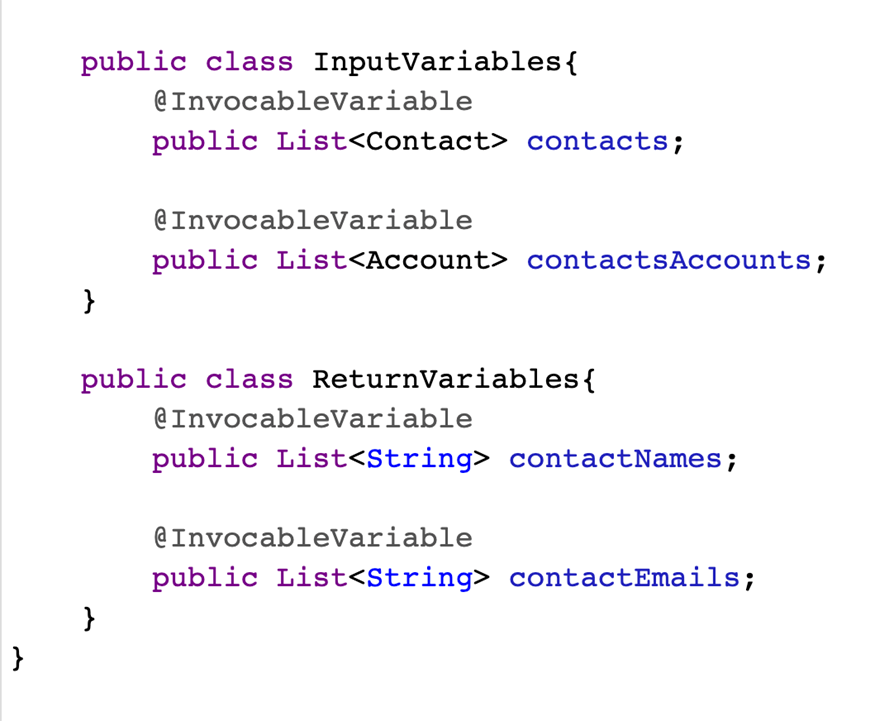
Create Invocable Variable:
- They support Modifiers, like invocable methods.
- Label, Description, Required.
- Other annotations can not be used with invocable variables.
- Static, Local, Final, Protected, Private.
Add Logic to the code:
After setting up our method and variables, the final step we need to do is get the input/output values in our class and perform whatever level of complex logic we want.
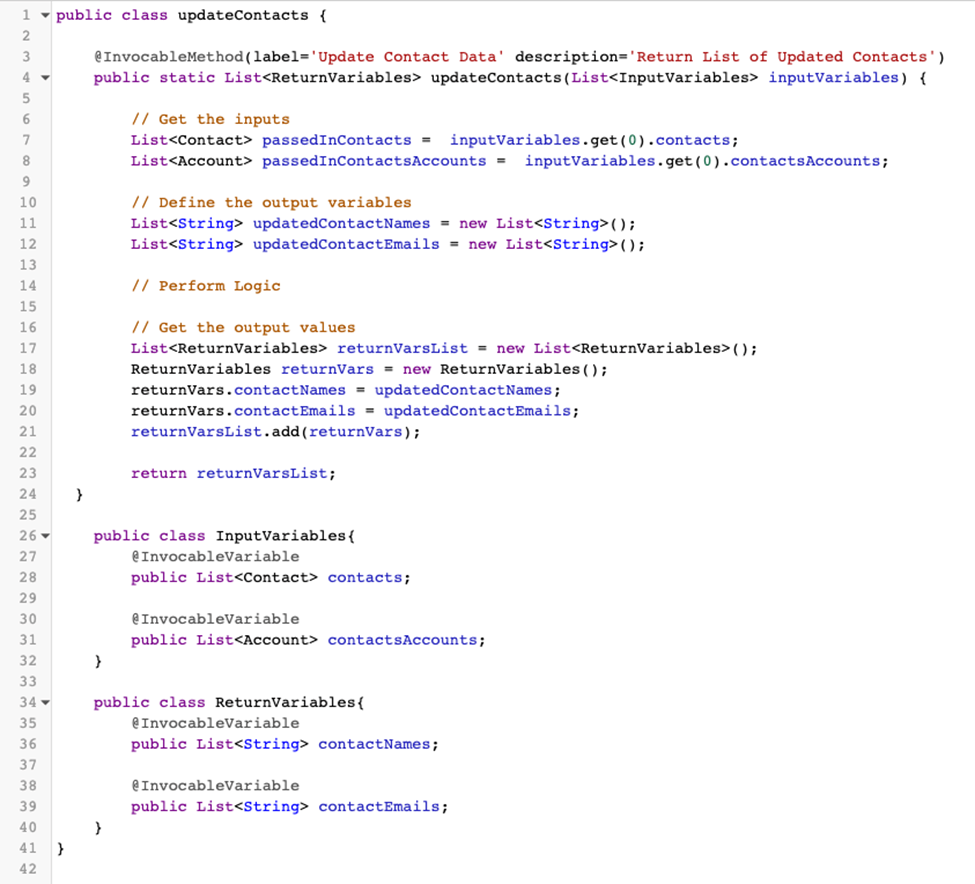
Invoke Apex from Flow :
Now that our Apex class is all set up. Then we have to incorporate it into your flow.
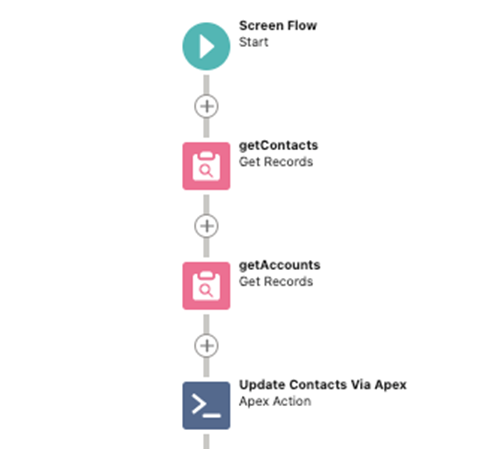
After collecting the data or records you want to pass in, add an Apex Action to your flow.
- Select your invocable method: the label you created will appear as an option.
- Set the input parameters from what you collected in your flow.
- Set the output parameters as variables you defined.
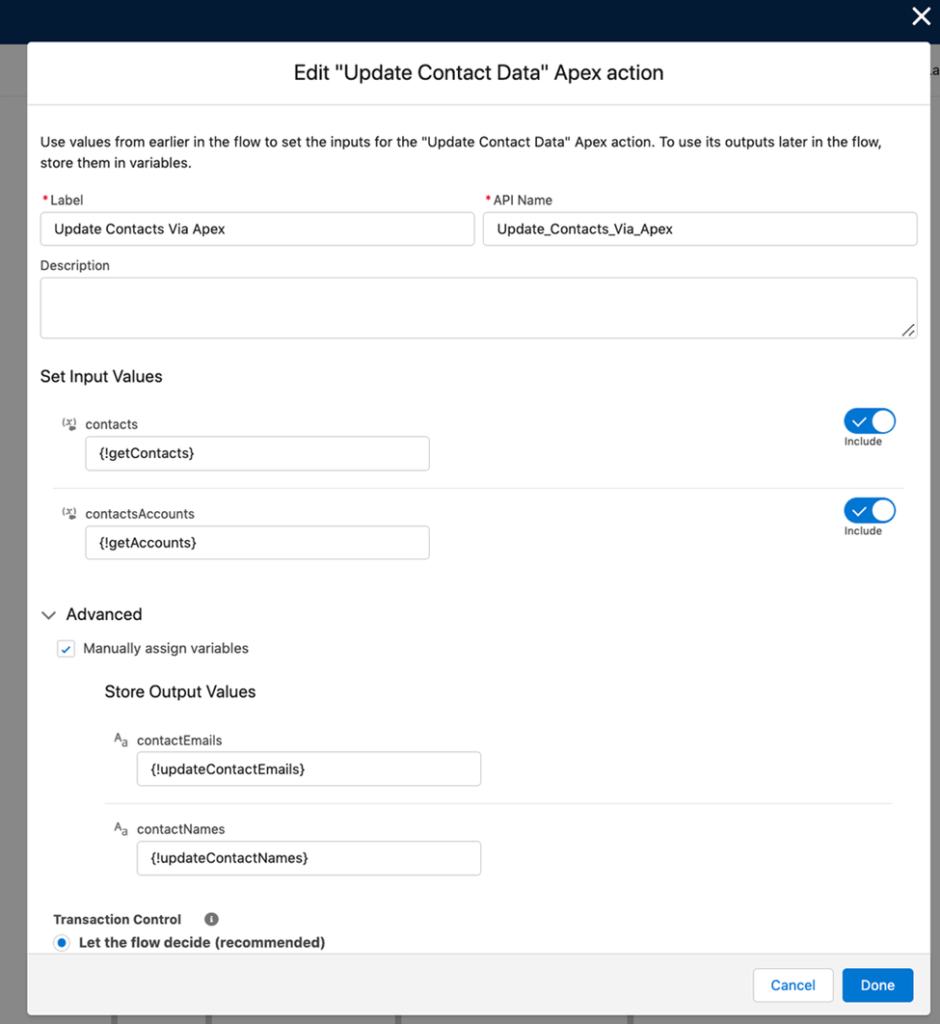
Finally, created an invocable method to provide support to your flow!
Flow :
Salesforce Flows enable you to build business processes just by clicks. This ceases the need for coding and you will thus be able to take care of complex business operations without a developer.
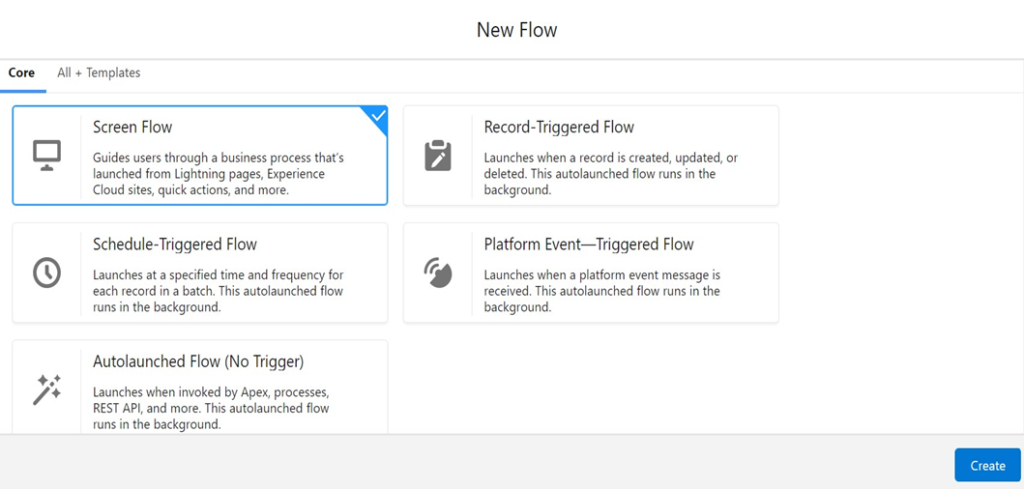
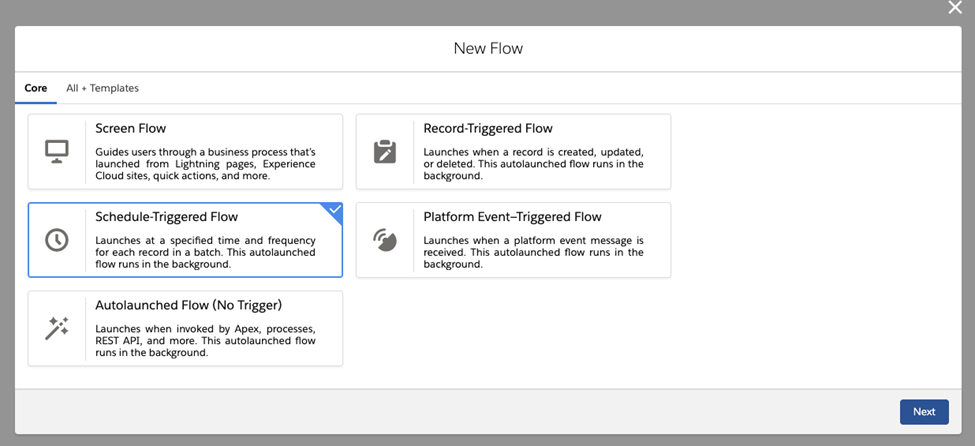
Types of Flow:
- Screen Flow.
- Record Triggered Flow.
- Schedule Triggered Flow.
- Platform-Event Triggered Flow.
- Auto launched Flow (No trigger).
Screen Flow:
Screen flows provide a way to guide users through a business process; they provide instructions or call scripts, prompt users to complete certain fields, and then perform actions behind the scenes such as Record Create or Record Update.
Steps to Create a Screen Flow :
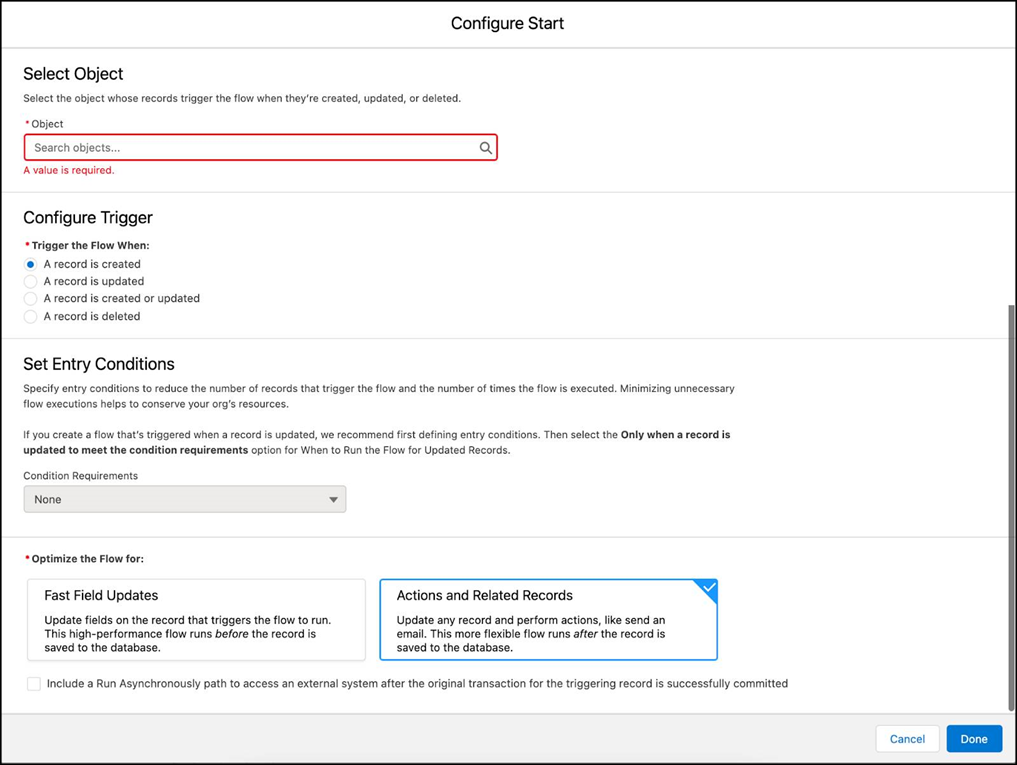
- From Setup, enter Flows in the Quick Find box, then select Flows.
- Click New Flow.
- Select Screen Flow.
- Click Create. The Configure Start window opens.
Screen Flow Components :
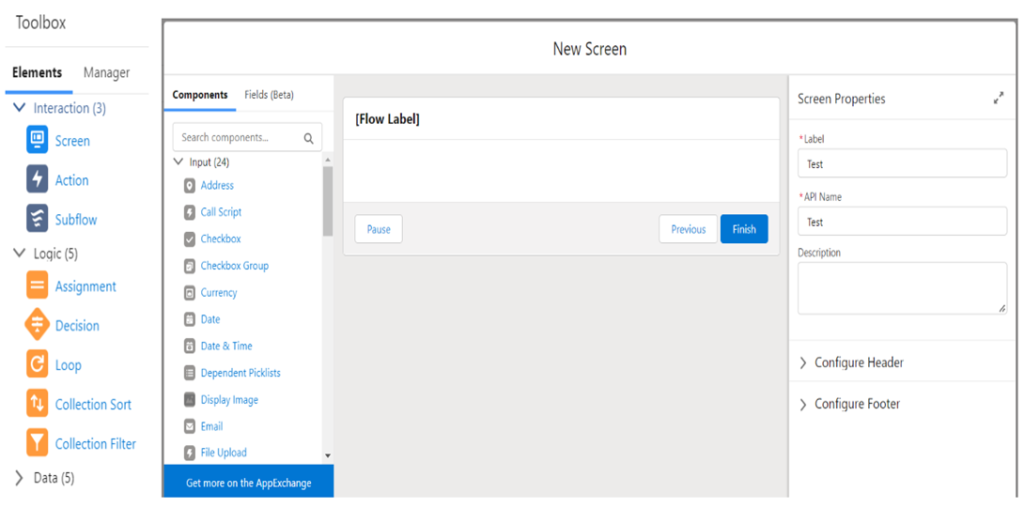
Here are a few examples of useful components:
- Email: This component is very handy when an email address is needed from the user running the screen flow.
- File Upload: Exactly as the name says, this will allow your users to import files directly through the screen flow. This is especially handy as users won’t have to navigate to other pages to add files.
- Toggle: This component is for the user experience within a screen flow as it can replace a checkbox or a yes/no Picklist.
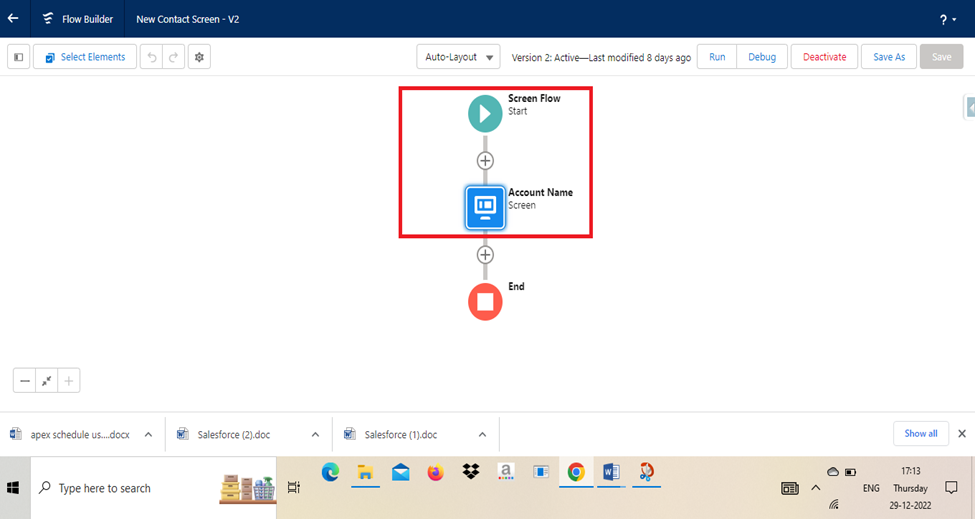
Created a Screen Flow :

Record Triggered Flow:
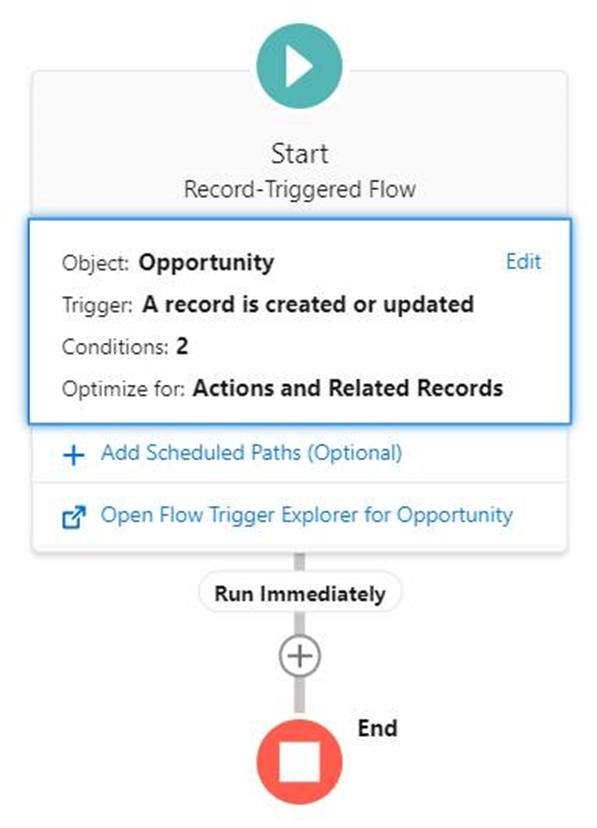
A Record-Triggered Flow allows your business to automatically perform actions in Salesforce, in the background based on Create, Update, or Delete Record Events.
Steps to Create a Record Triggered Flow:
- From Setup, enter Flows in the Quick Find box, then select Flows.
- Click New Flow.
- Select Record-Triggered Flow.
- Click Create. The Configure Start window opens.
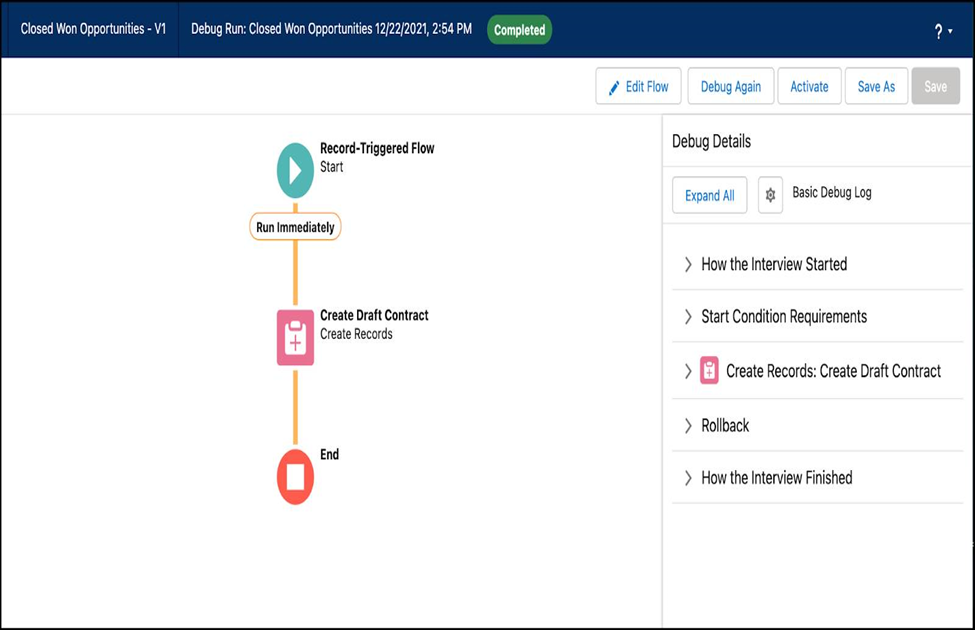
Created a Record Triggered Flow:
Schedule Triggered Flow:
- A schedule-triggered flow starts at the specified time and frequency.
- And they run in background You can’t launch a schedule-triggered flow by any other means.
- The Start Time field value is based on the Salesforce org’s default time zone.
Steps to Create a Schedule Triggered Flow :
- From Setup, enter Flows in the Quick Find box, then select Flows.
- Click New Flow.
- Select Schedule Triggered Flow.
- Click Create. The Configure Start window opens.
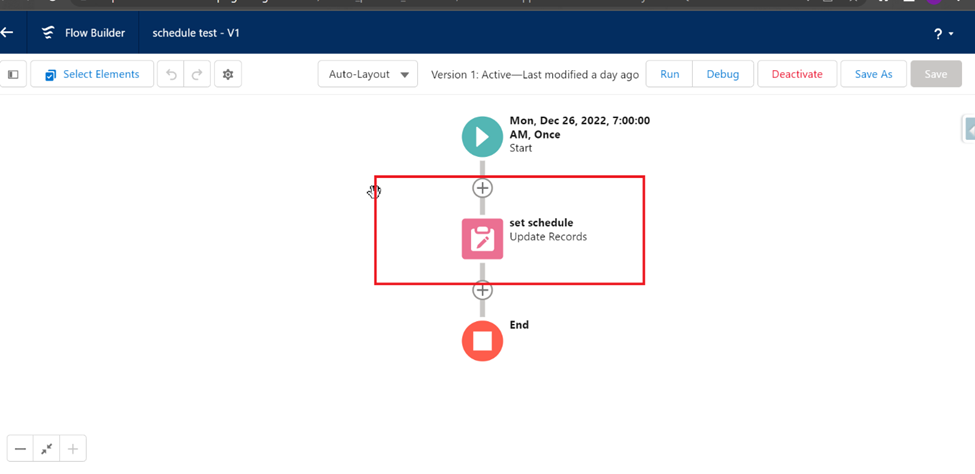
Query limit for Scheduled Flow :
- Scheduled flows are basically the low code replacement for Scheduled Batch Apex.
- In a normal transaction, you can only query up to 50k Records (Governor limit).
However, Batch Apex, allows you to query up 50 Million Records
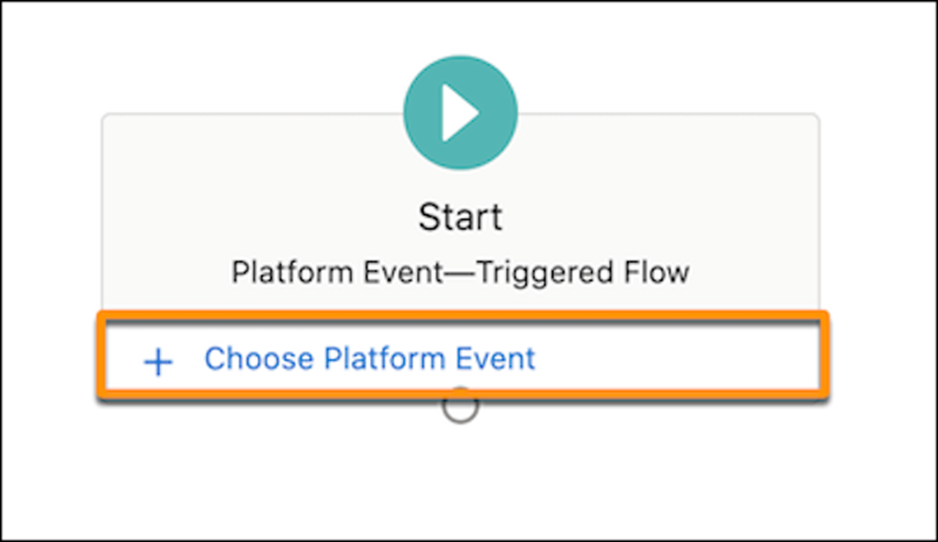
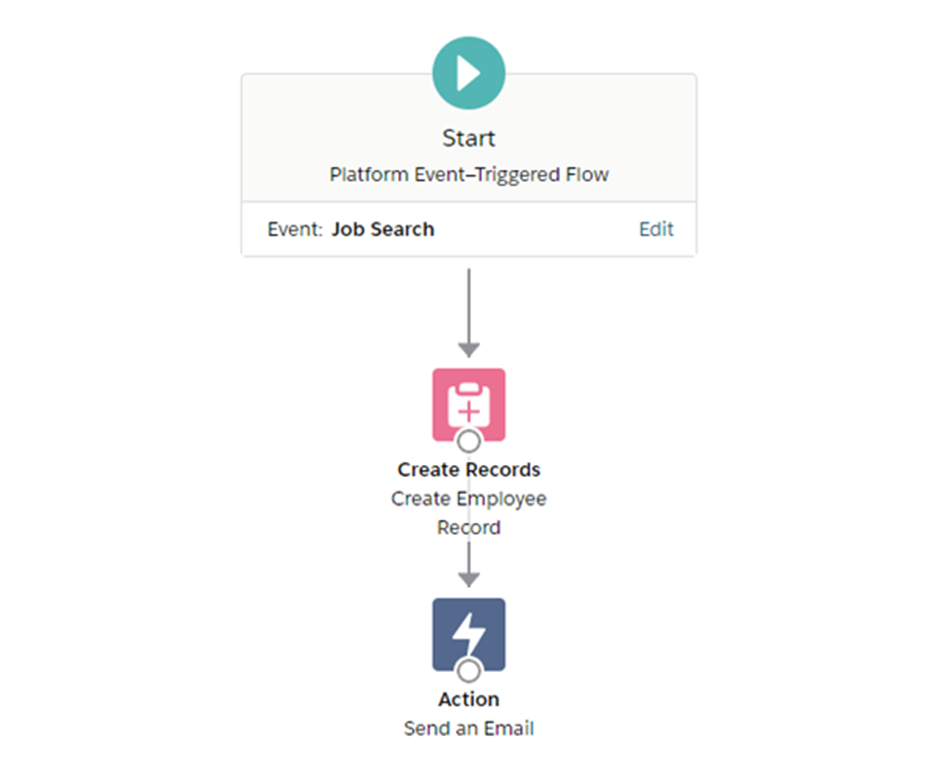
Platform Event-Triggered Flow:
Platform event triggered flow launches when a platform event message is received. This auto-launched flow runs in the background. Similar to objects we can use the platform event field values from the platform event message by referencing the $Record global variable.
Steps to create a Platform Event-Triggered Flow :
- From Setup, enter Flows in the Quick Find box, then select Flows.
- Click New Flow.
- Select Platform Event Triggered Flow.
- Click Create. The Configure Start window opens.
Platform Event-Triggered Flow:

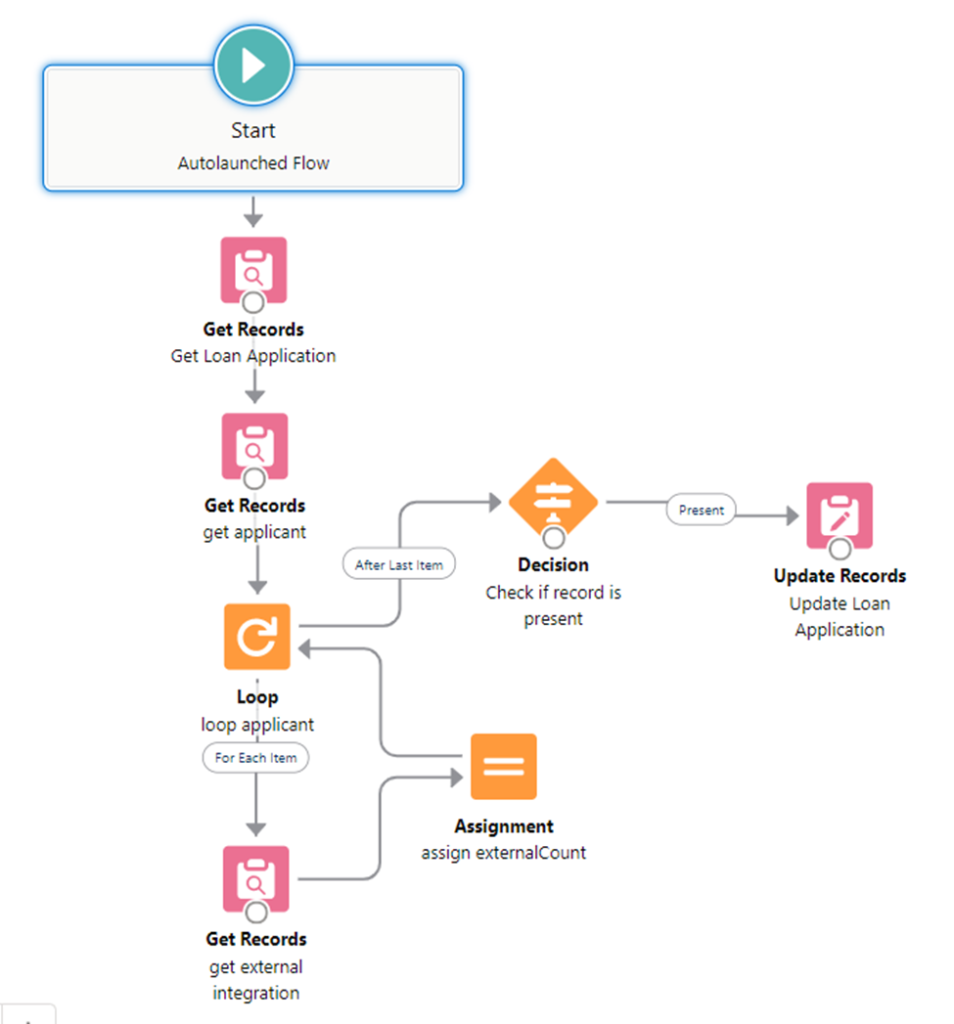
Auto Launched Flow (No Trigger):
These are flows that can be started automatically in response to particular conditions or events. For example, we can use the process builder to launch a flow anytime any DML like (Insert, Delete, Update) occurs, or any platform event occurs.
How do I trigger an Auto launched flow in Salesforce?
Creating or updating a record can trigger an auto launched flow to make additional updates to that record before it’s saved to the database. A record-triggered flow can update a Salesforce record 10 times faster than a record-change process. Configure the record trigger in the Start element of your auto launched flow.
Steps to create an Auto Launched Flow :
- From Setup, enter Flows in the Quick Find box, then select Flows.
- Click New Flow.
- Select Auto Launched Flow.
- Click Create. The Configure Start window opens.
How do I call auto launched flow from Process Builder?
To launch a flow from a process, you must create and activate the flow. The flow must be auto launched. Enter a name for this action.
Set a value for the flow variable :
- For collection variables, use the text entry field to specify a value. …
- For record variables, use the field picker to select an ID field.
Auto Launched Flow: