DevOps Centre
Salesforce Launches DevOps Centre to Accelerate Development and Shorten Release Cycles.
- It’s a modern change management and release management tool.
- It available natively in salesforce.
- It provides an end-to-end Experience allowing developers and admins to work together to build and deploy salesforce applications.
- It’s a point and click interface allows you to manage environments, easily track changes seamlessly integrate with source control systems and perform deployments.
Installation and Setup:
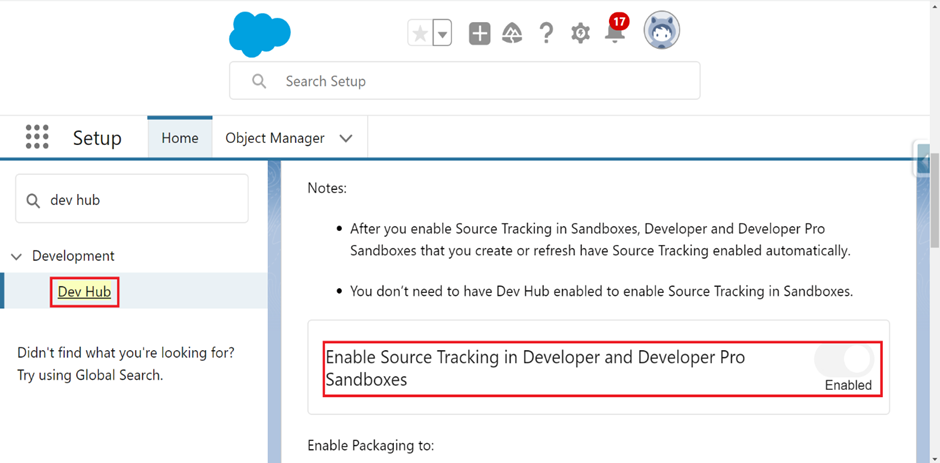
- Go to setup, in quick find search Dev Hub and verify source tracking in developer and developer pro sandboxes is Enabled.
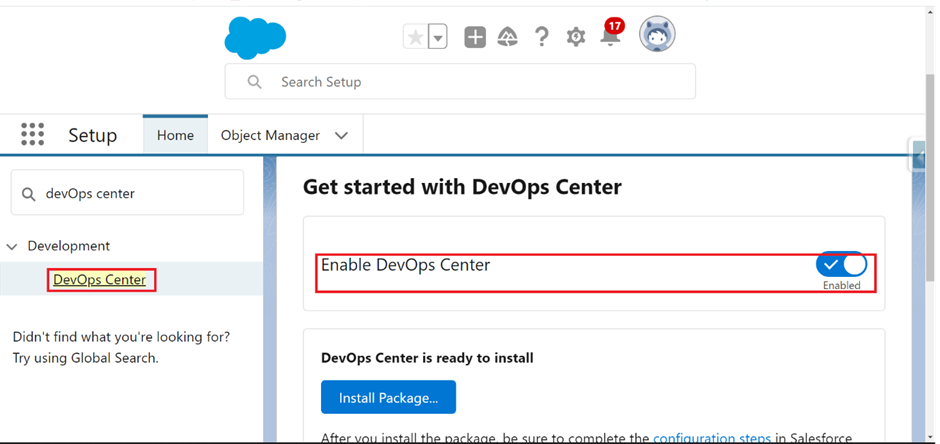
- In quick find, Search DevOps center and make sure that DevOps center is enabled.
- After enable, Accept License agreement popup will Shown, and click Accept.
- Install DevOps center package, select install for admins only.
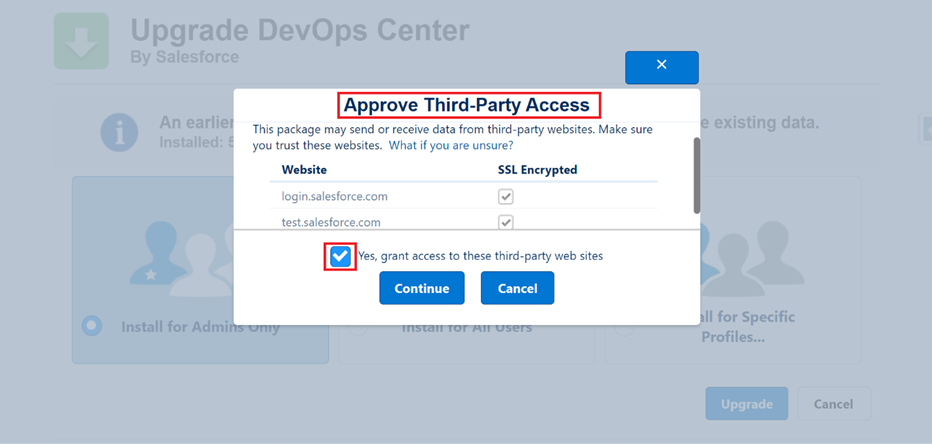
- Approve Third-Party Access popup will shown,verify the checkbox is selected and click continue.
- And proceed with Done.
Creating Connected App:
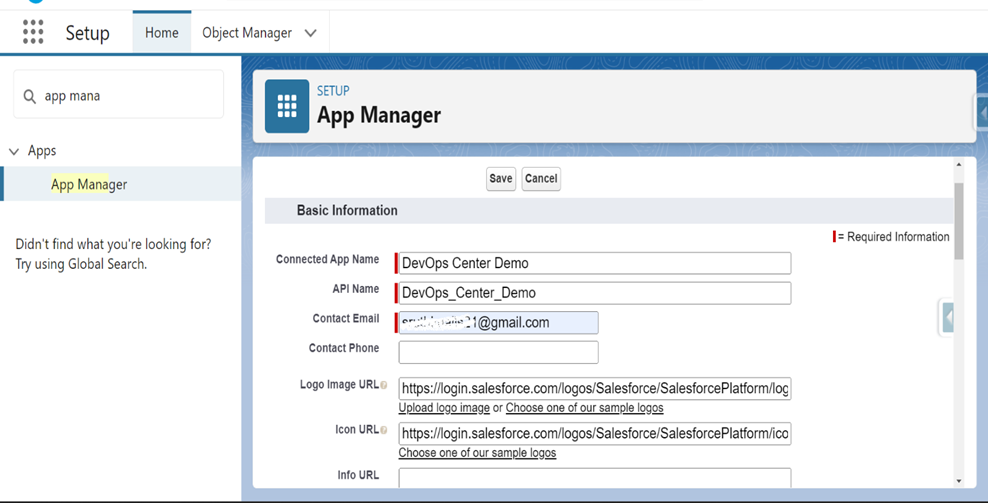
- In Setup, Quick Find Search App Manager, And click New connected App.
- Enter the details, and click Save.
Assigning Permission Set to the Connected App:
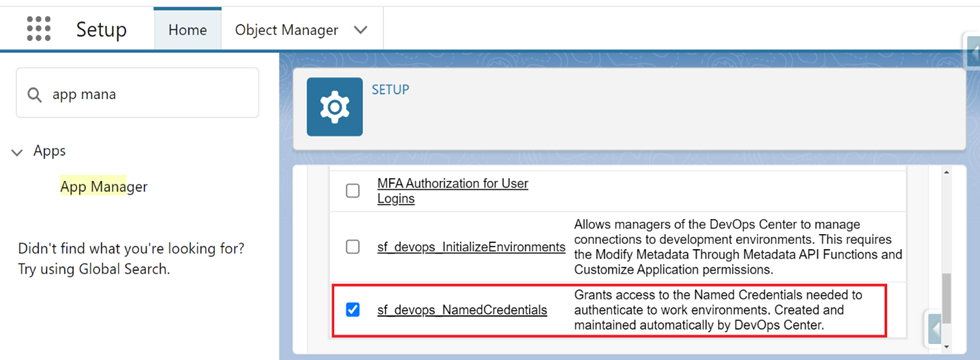
- In Connected App, Click Manage ,In Permission Set Select Manage permission Set.
- And Select Sf_devops_Named_Credentials.
- Save.
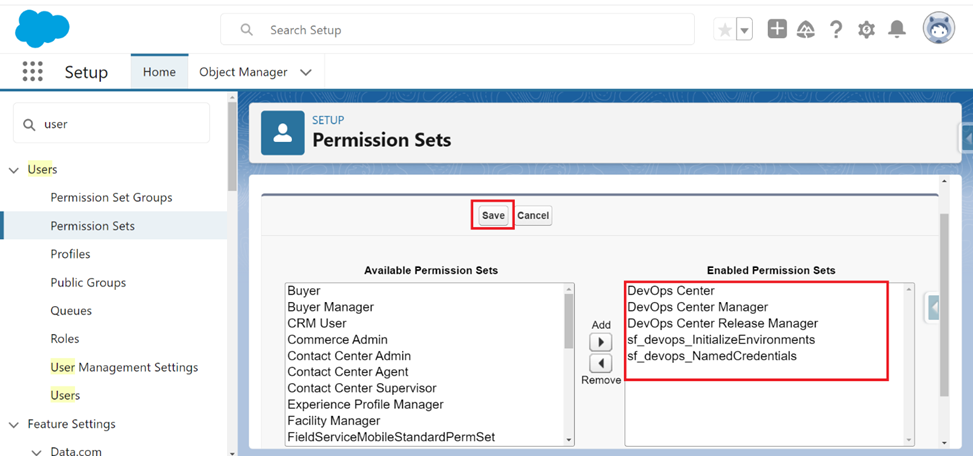
Permission Set Along with DevOps Center:
| Permission Set | Description | Assign To |
| DevOps Center | Base Permission Set | All DevOps Center Users |
| DevOps Center Manager | Access and permission needed to set up projects, environments and users | Team Manager/ Project mangers |
| DevOps Center Release Manager | Perform promotions through yhe pipeline | Release Manager |
| Sf_devops_Initialize Environments | Manage Connections to work environment | Team Managers/ project Managers |
| Sf_devops_Named_Credentials | Grand access to the named crendentials needed to authenticate to environments | All DevOps Center Users |
- Going to my user record and Click Permission set Assignments.
- Assign all these permission sets to my user account.
- Click Save.
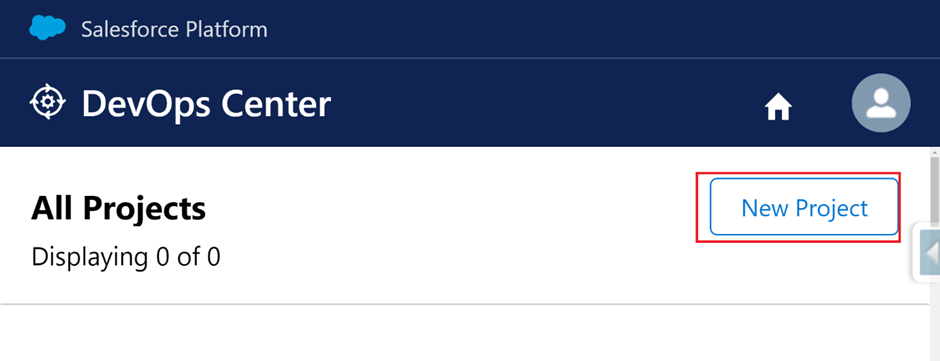
- In App launcher, Search DevOps center and Select DevOps center.
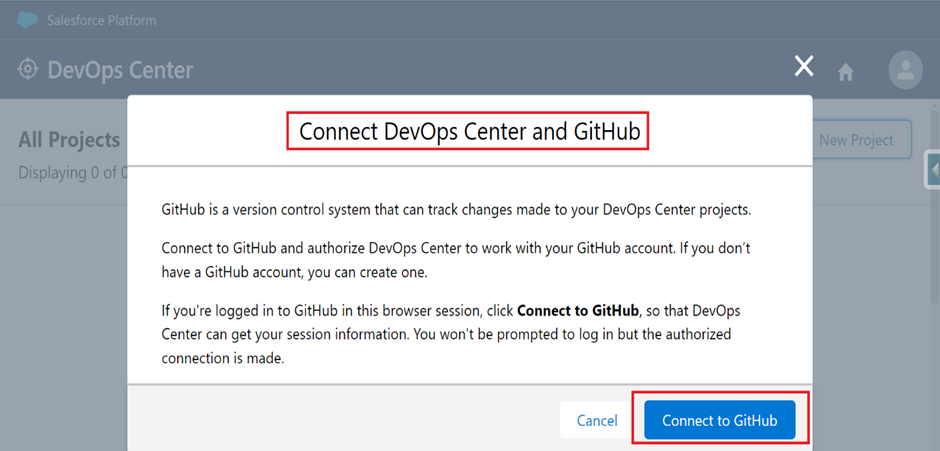
- In right Corner, Select New Project. Popup will be shown Click Connect to GitHub and give your Credentials.
- It Shows Authorize GitHub is successful.
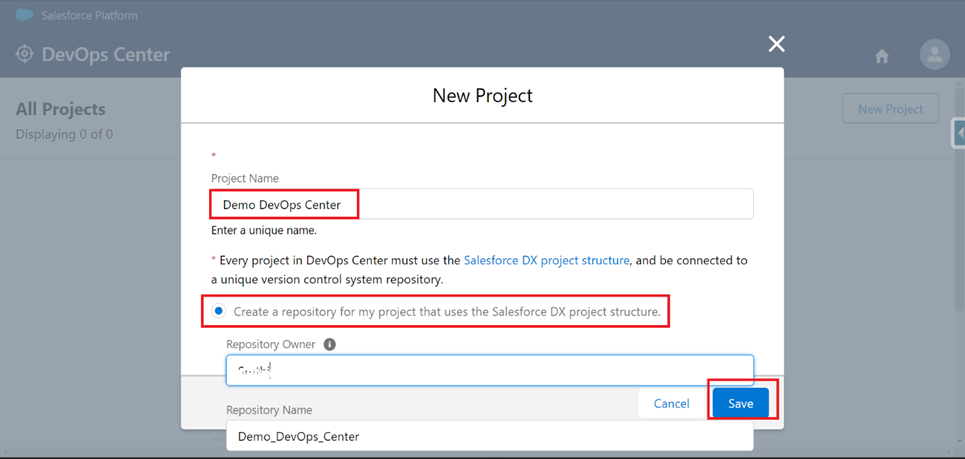
- Provide a Project name And Repository name.
- Click save.
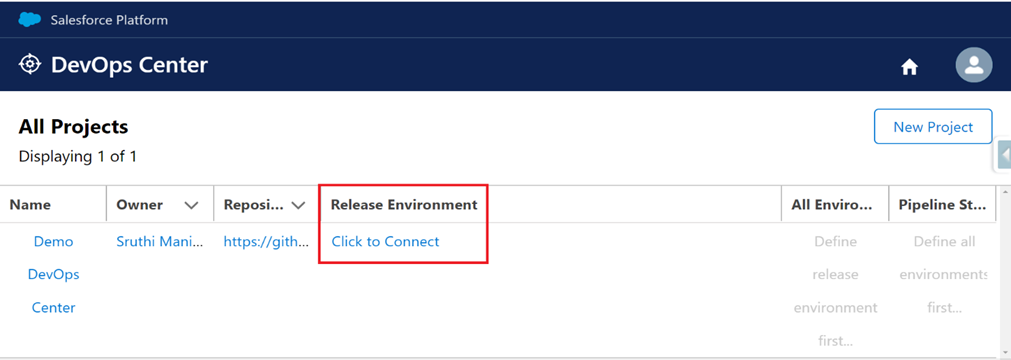
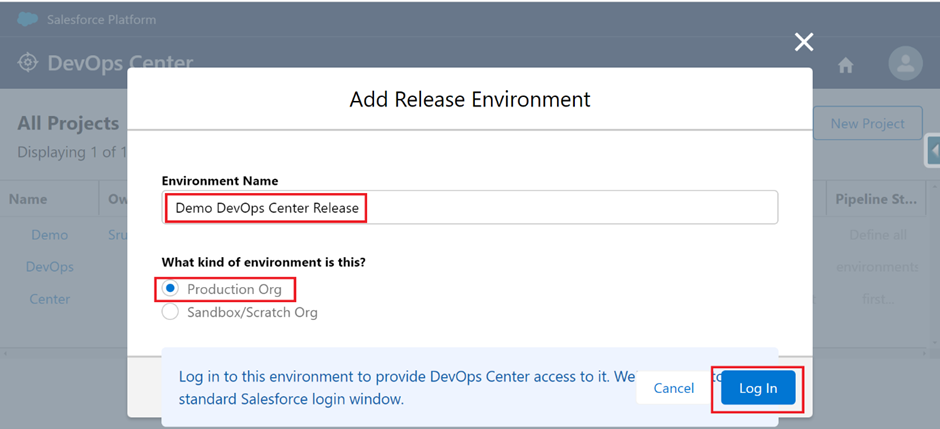
Add Release Environment:
- Click Add Release Environment and provide Environment Name and Select what kind of environment.
- Select production org and Login. And its Shows Production environment login Credential – click Login.
- Click Allow, and it connected to your production org.
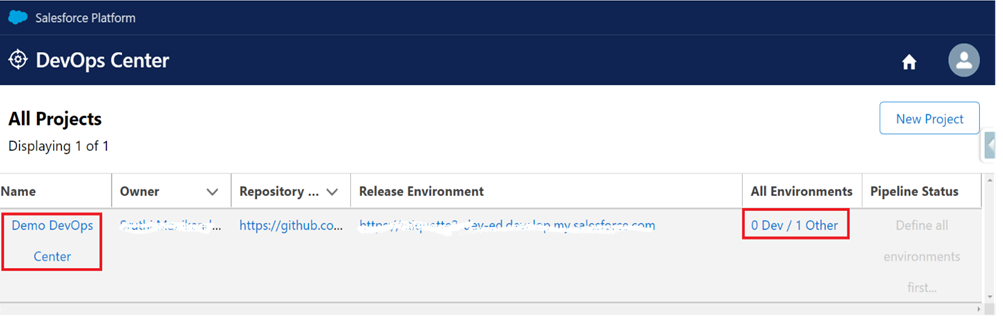
Add Development environment to the projects:
- In all environment under click the Highlighted link.
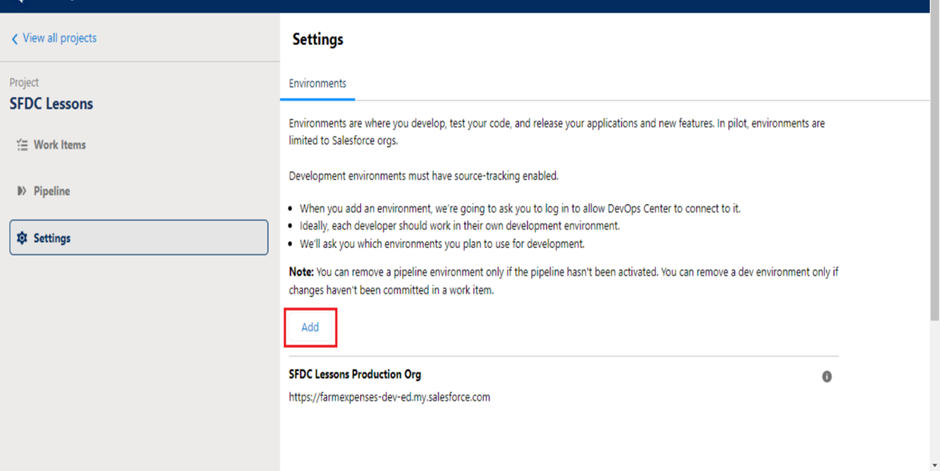
- After Clicking the Add Button, it will take you to the next step.
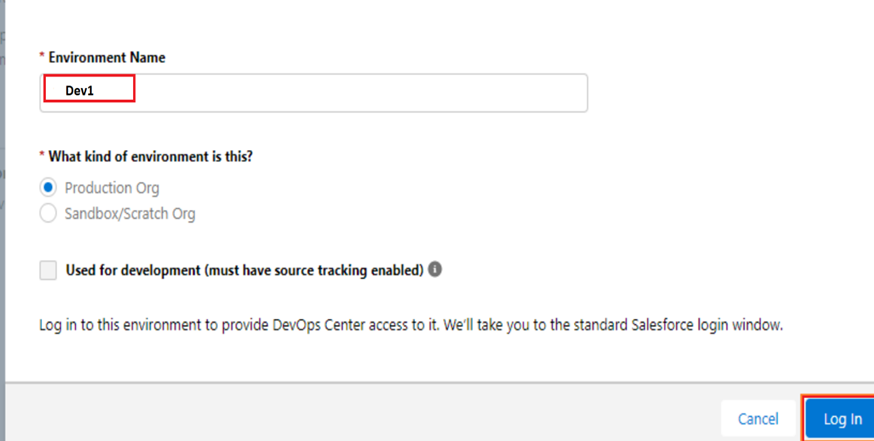
- Enter the Environment Name.
- Select the Type of the org. (Production/Scratch/Sandbox).
- Check the checkbox used for development.
- Click log in.
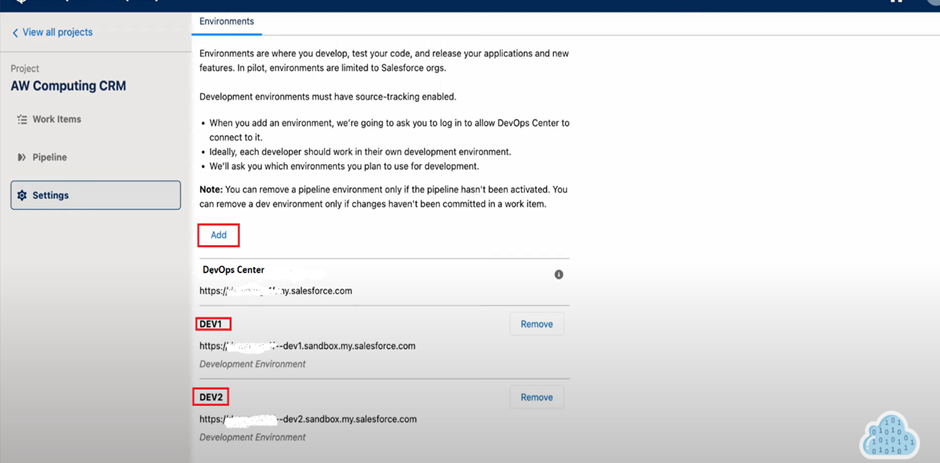
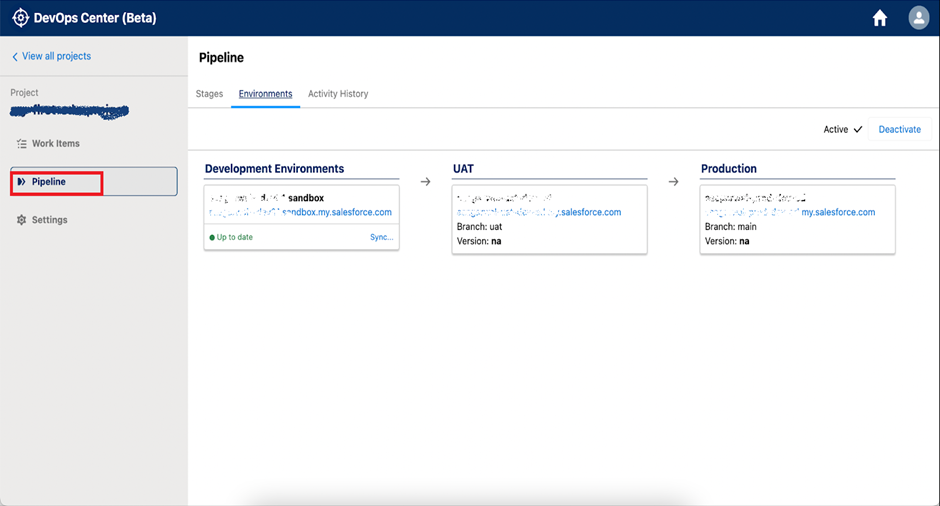
Finally, your page looks like this,I have added DEV1 and DEV2 Environment.

DevOps center App has been successfully Configured.
Work Items:
Work item is a ticket that is used in DevOps center to track the work process to achieve a specific Goal.
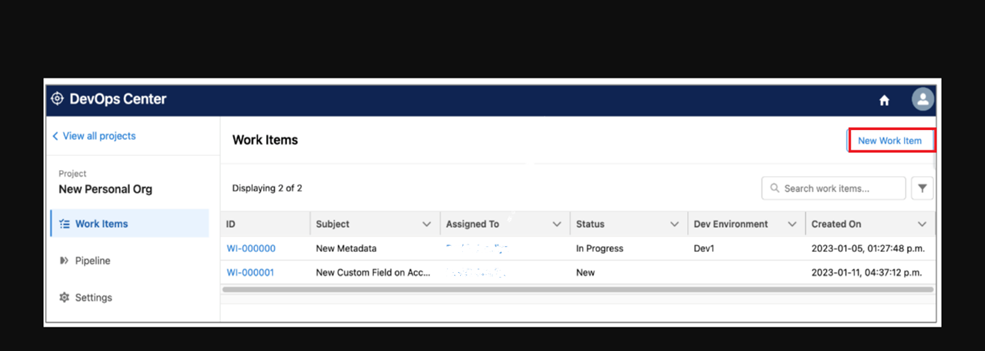
In left side corner, Click Work Items.
Click New work Item Button.
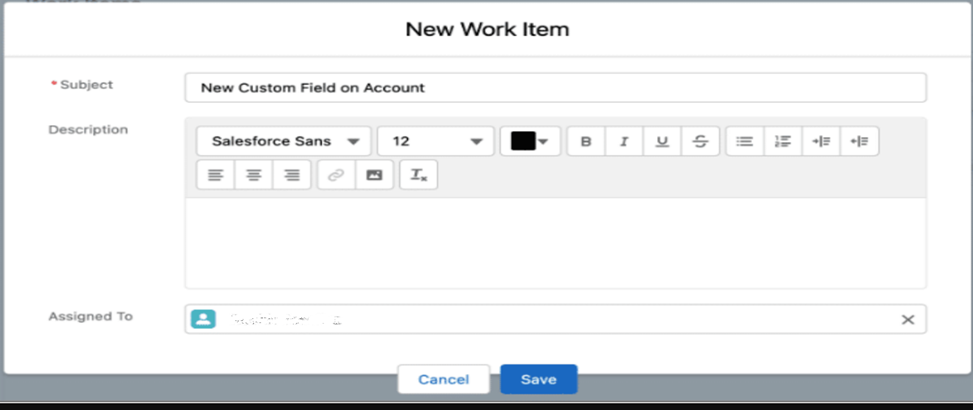
And assign a Work Item to Particular user and click on save.
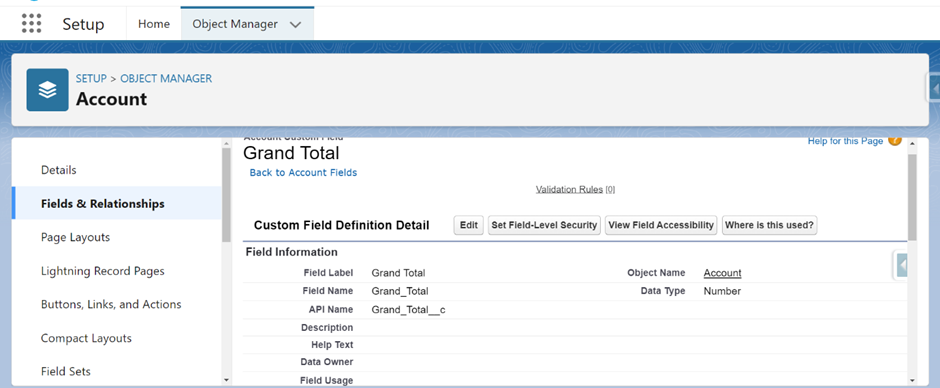
According to the Work Item, Created a New Custom Field on Account Object.
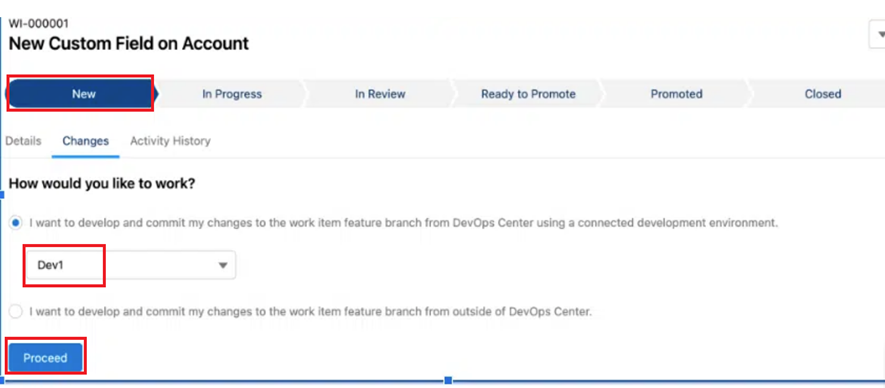
And Push these changes From github.
By clicking Proceed, It will Create Branch in GitHub.
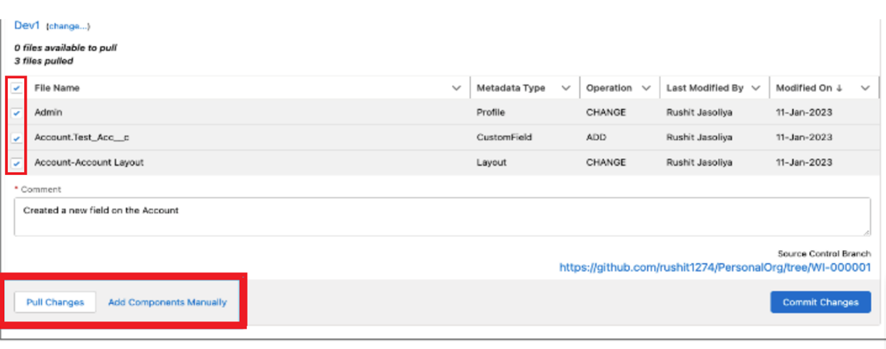
By Selecting Changes ,And Click Pull Changes.

- Click Create Review,it will create a Pull Request.
- And now pull request has been created.
- You can see the pull request in branch (gitHub)
- Click pull requests and then merge pull requests. Click confirm merge.
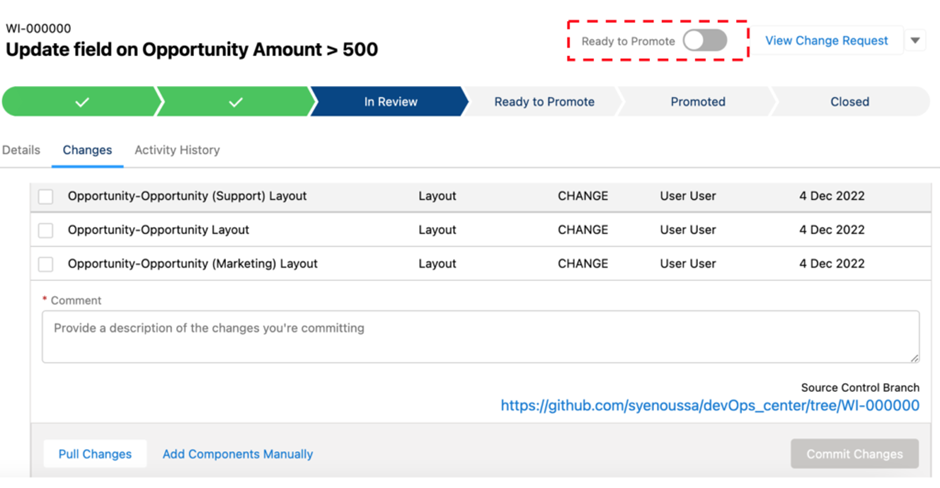
- Next, Enable Ready to Promote.
- Now click Pipeline,you can see your work item its ready to move to higher environment.
- Click Complete Promotion.
- You can see the Deployment in the sandbox.
- You will receive a popup message that promotion is successful.